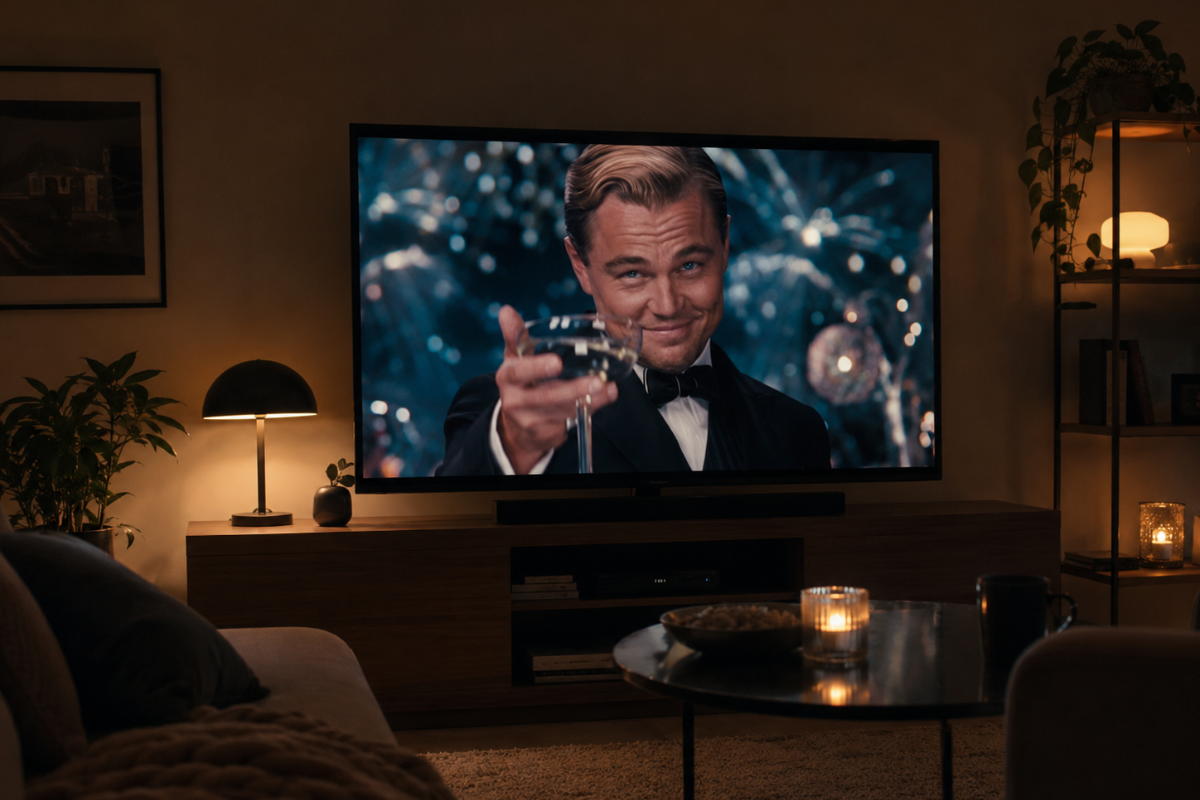
Your new TV may not be at its best right out of the box. The default settings may enhance brightness, color, and motion in a way that looks effective in the store, but at home the picture may be too cold, choppy, or unnatural. Often, a better picture can be found with a few basic adjustments.
When you take a new TV out of the box and turn it on for the first time, many people assume that the picture will automatically be right. This is not always the case. After you turn it on, your TV uses the manufacturer's default settings, which are designed to work in as many situations as possible. However, they may not be the right fit for your living room, viewing distance, lighting, or the content you watch most on your TV.
In stores, TVs are often brightly lit, next to other screens, and playing impressive demo videos. In these cases, the enhanced brightness, intense colors, and sharp image processing help the TV stand out. At home, the situation is different. The room is usually darker, the viewing time is longer, and the content is regular TV, streaming, movies, sports, or games. In these situations, settings that are too intense can impair the viewing experience.
The good news is that the average user doesn't need to do any actual calibration with measuring devices. A few general adjustments usually go a long way. The key is to choose the right picture mode, check brightness and color temperature, reduce unnecessary image processing, and use different settings for movies, sports, and gaming.
Don't rely directly on default settings
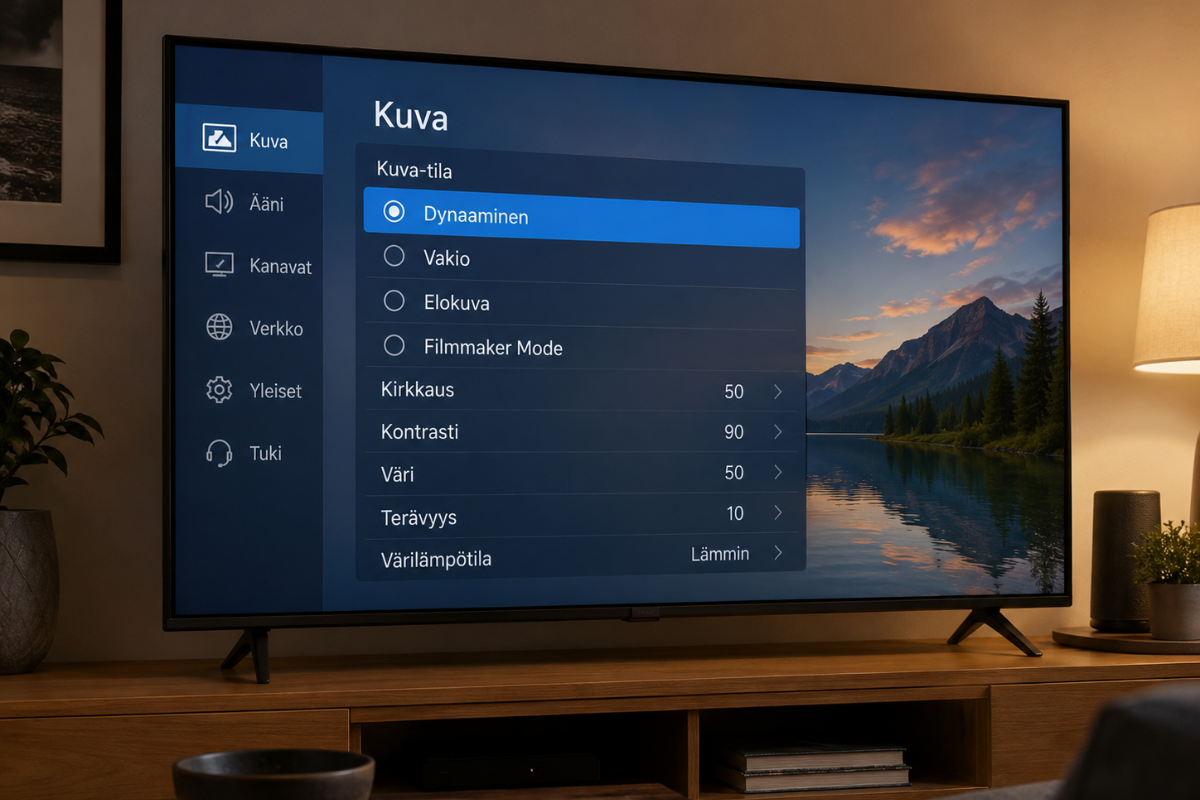
The first rule is simple: don't leave your TV in the picture mode it was set to when you first turned it on. The default mode may be called something like Standard, Dynamic, Vivid, Bright, or Vivid. The names vary from manufacturer to manufacturer, but the idea is often the same. The picture is made more impressive by increasing brightness, contrast, color saturation, sharpness, and motion processing.

This type of image may look good at first glance. Whites are very bright, colors appear vibrant, and the image feels sharp. As you look at it for longer, problems become more apparent. Skin tones may appear too red or bluish, details may be lost in dark scenes, and motion may appear too smooth or artificial.
For most users, a better starting point is Movie, Cinema, Movie, Filmmaker, or ISF mode, if available on your TV. These modes are generally designed to be calmer and more natural. They don't look as harsh in store lighting, but they are often a better base for adjustments at home.
Start with the room, not the menu
The TV picture cannot be adjusted independently of the viewing environment. The same TV will look different in a bright living room, a dark home theater room, and a room lit by the evening sun. That's why it's a good idea to adjust the picture in the lighting where you watch TV the most.
If you watch a lot of movies in the evening, it's a good idea to make adjustments in the evening lighting. If the TV is on a lot during the day, it's a good idea to make sure the picture works in a bright room as well. Some TVs allow you to save separate day and night modes. This is often a more practical solution than one compromise setting for all situations.
Reflections are often a bigger problem for picture quality than the settings themselves. If the screen reflects off a window, a light fixture, or a light-colored wall, blacks won't look black and contrast will suffer. Closing curtains, moving a light fixture, or changing the angle of the TV can improve the picture more than any menu adjustment.
Choose a calm picture mode
Choosing a picture mode is the most important single adjustment. A good starting point is a mode that aims for a neutral picture and does not emphasize everything as much as possible. For example, choose Filmmaker Mode, Cinema, Movie, ISF Dark or ISF Bright on your TV.
Filmmaker Mode is often a good choice for movies and TV shows because it removes a lot of the extra image processing. It may not be perfect on every TV, but it usually gets the picture in the right direction. If the picture initially feels too warm or less bright than the default mode, it's worth giving your eyes a moment to adjust. Often, it's not a matter of a worse picture, but rather that the previous picture mode has been overemphasized.
In a bright room, Movie or Filmmaker mode can sometimes be too dim. In such cases, instead of switching to Dynamic mode, you should moderately increase the backlight, OLED light, or panel brightness setting. This will keep the basic nature of the image more natural, but will increase the light output.
Check energy saving and light sensor
Many TVs have an energy-saving mode or automatic brightness adjustment turned on by default. This can be good for power consumption, but the results vary in terms of picture quality. If the picture looks strangely dim, the first thing to check is the Eco setting.
Energy saving mode can limit the screen's brightness so much that even a good TV looks dim. The automatic light sensor, on the other hand, adjusts the picture according to the lighting in the room. It can work well, but in some situations it makes the picture too dark or changes the brightness in a disturbing way.
A basic user should try the picture with both automatic mode on and off. If the picture is clearly better without Eco mode, it can be left out or set to a milder level. If the automatic mode works unobtrusively, it can be used, especially in a room where the lighting varies a lot.
Adjust the brightness so that shadows are not obstructed
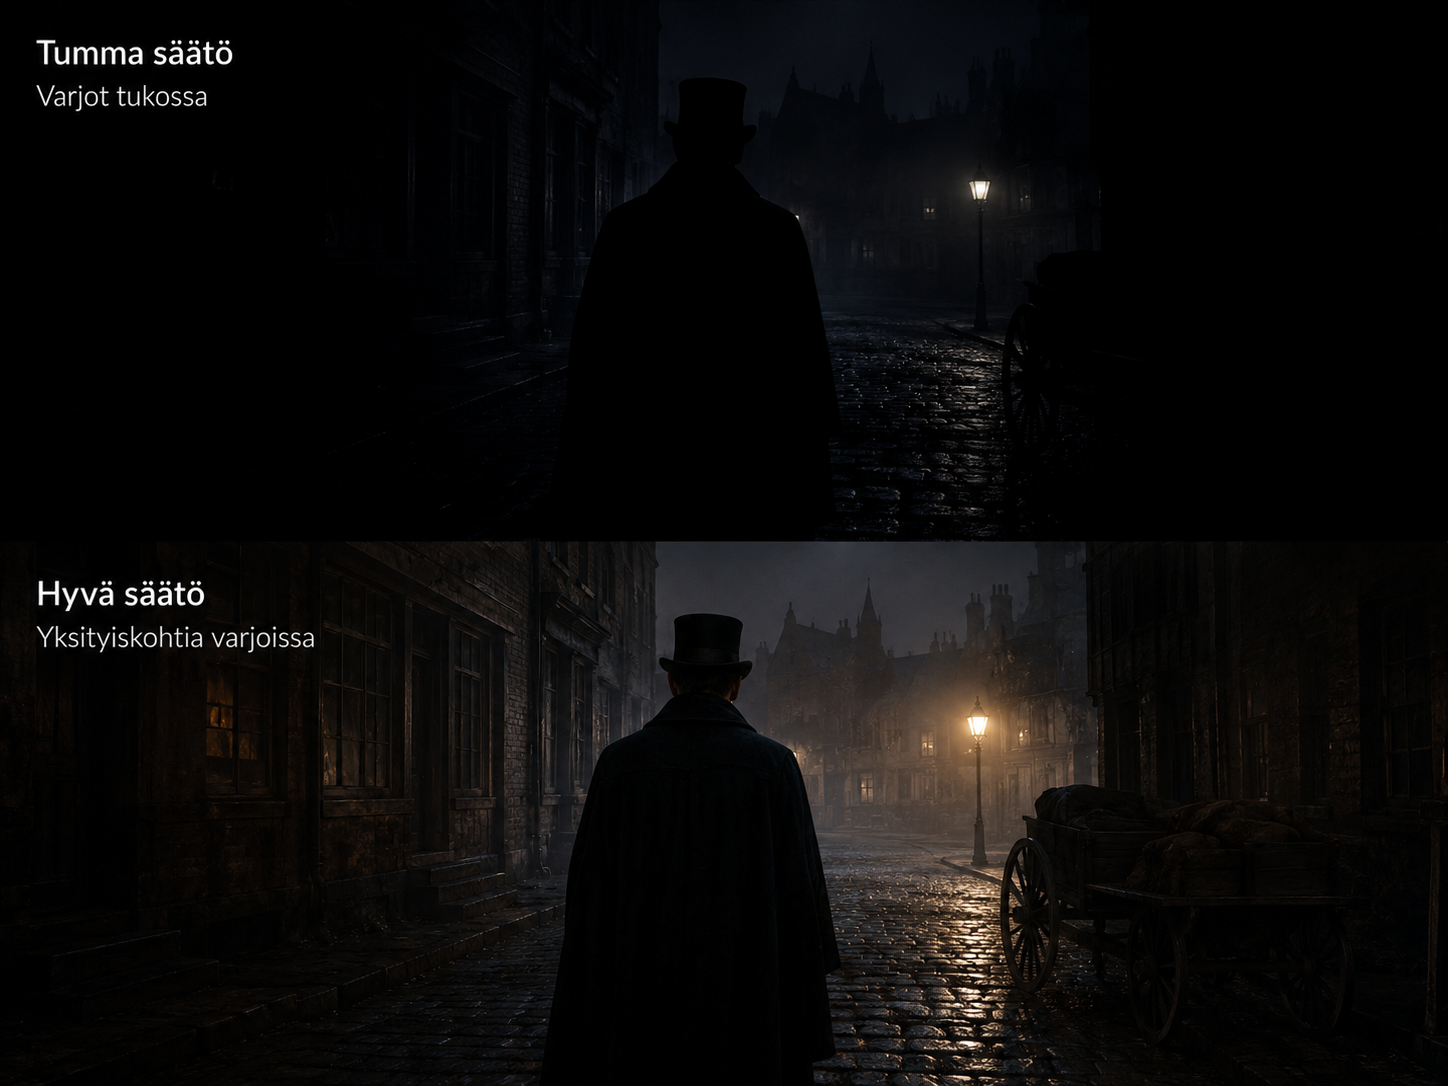
Brightness is one of the most confusing TV settings because it doesn't always mean the same thing as it does in everyday language. On many TVs, brightness affects the black level. If the setting is too low, dark areas turn into a solid black mass. If it's too high, black turns gray and the picture looks flat.
A good setting will make black look black, but you can still see details in the dark areas. In a night scene in a movie, you need to distinguish, for example, the folds of clothing, hair, or shapes in the background. If everything disappears into darkness, the brightness or black level is too low. If the entire image looks gray, the setting is too high.

On an LCD TV, the overall brightness is usually adjusted by setting the backlight or panel brightness. On an OLED TV, the equivalent adjustment may be OLED brightness or pixel brightness. You should use these settings depending on the lighting in the room. The black level adjustment should not be confused with how bright the entire screen is.
Contrast on point without burn-in
Contrast affects how bright areas are reproduced. Too low a contrast makes the image dull. Too high a contrast burns out bright details. This means that the tonal differences in clouds, snow, lamps or white clothes disappear.
Good contrast makes the image bright but doesn't flatten a light head. A white shirt should show fabric, clouds should show different shades, and bright lights should have shape. If light areas turn into just a white patch, there is too much contrast or the TV's brightness control is processing the image too strongly.
Color temperature warm
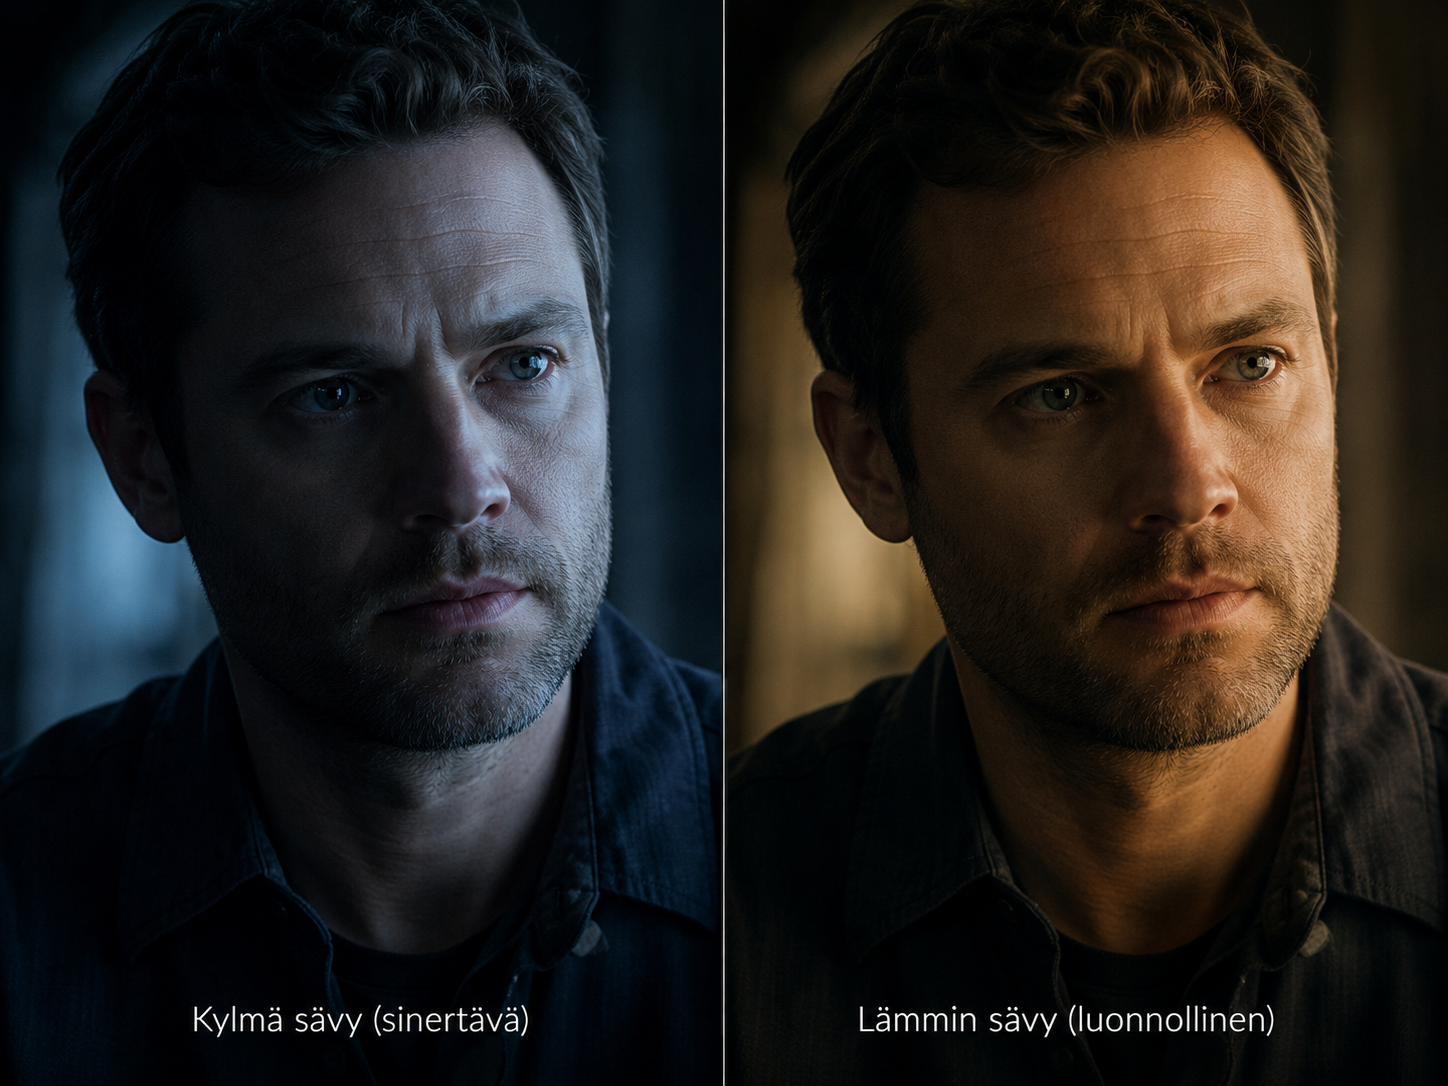
Many TVs look too cold by default. A cold picture basically means bluish whites and cool skin tones. In a store, such a picture may look bright and clean, but in your home it is usually not the most natural option.
When it comes to TV color temperature settings, Neutral may not be the right choice. Often, a more natural picture can be found in the Warm 1, Warm 2, Warm 1 or Warm 2 settings. At first, the Warm setting may look yellowish if your eyes are used to the blue image. After watching for a while, it often looks more natural, especially on faces.
Skin tones are a good place to check. If the face looks red, orange, or grayish, you may need to adjust the saturation or color temperature. If the face looks pale and cold, the image is often too blue.

Don't overdo the colors
Saturation affects how vivid colors appear. Too high a saturation can easily make an image look like a postcard. Grass becomes unnaturally green, the sky too blue, and faces reddish. Too low a saturation can make an image colorless.
For the average user, it's best to avoid color enhancement-type settings if you're aiming for a natural image. They may look impressive for a moment, but over time they will change the tone of the content.
Sharpness does not increase true accuracy
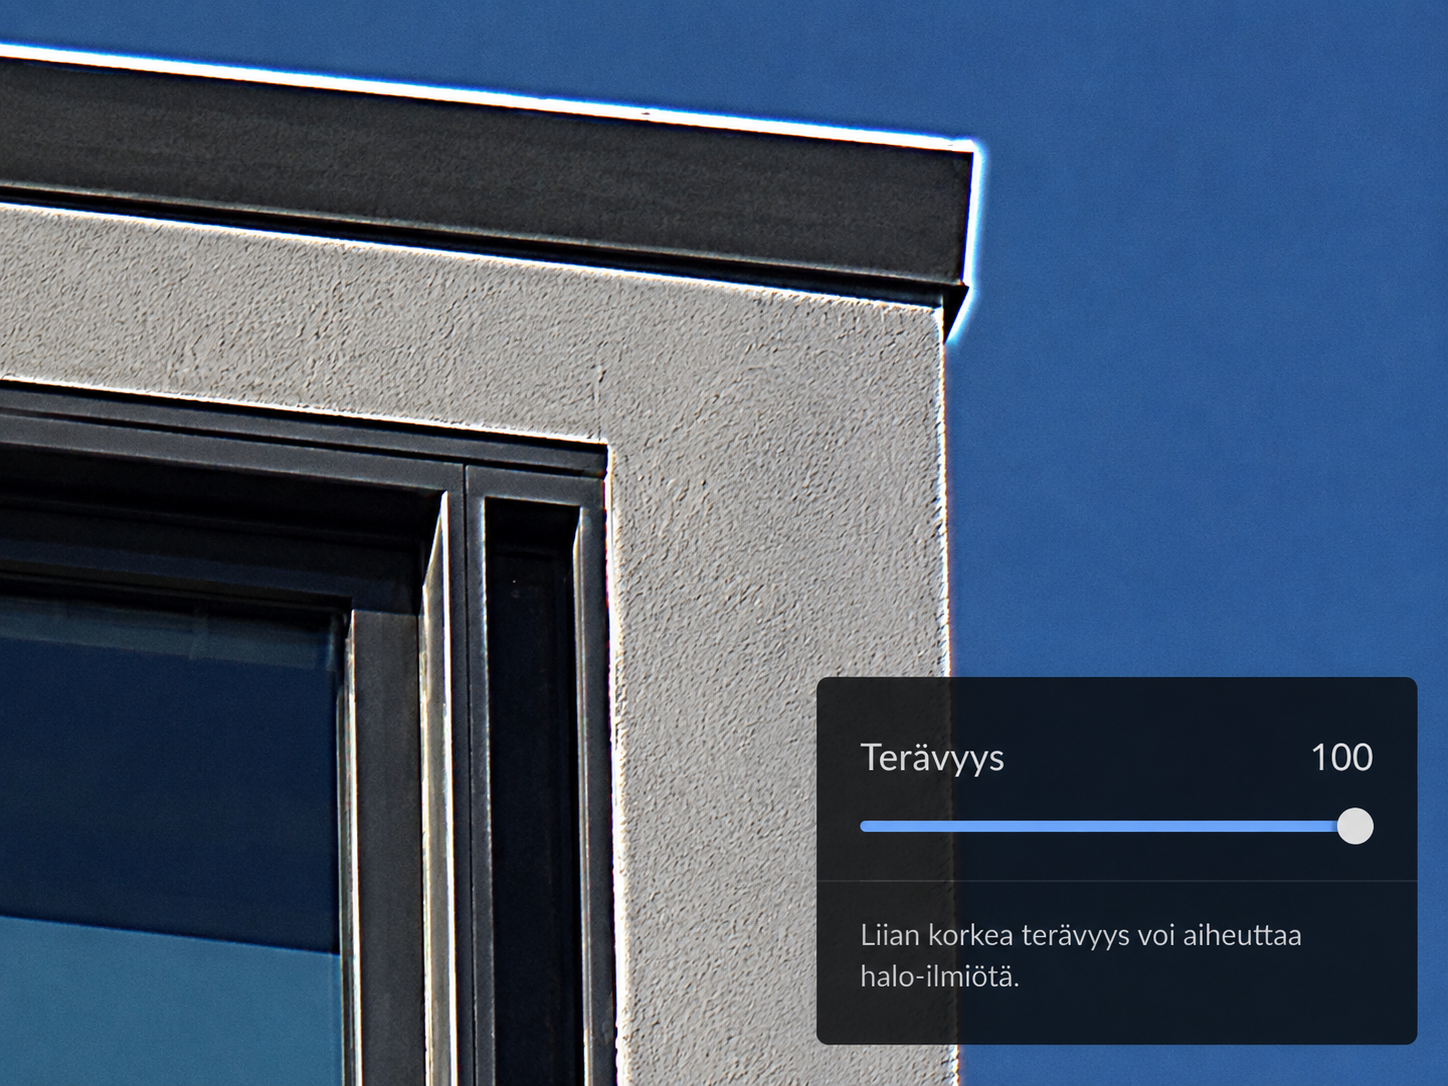
The sharpness setting sounds useful, but it should be used with caution. It does not increase the actual resolution of the image, but rather emphasizes the edges of objects. Too much sharpness will appear as light or dark edges around people, text, and buildings.
If thin white borders, halos or graininess appear in the image, the sharpness is set too high. A good 4K image usually needs almost no additional sharpening.

Movement improvement away from movies, into sports in moderation
Televisions often have motion enhancement, which makes motion smoother by adding extra frames calculated on the television between frames.
In sports, motion enhancement can be useful. Fast camera movements, the ball, and players can look clearer if the processing works well. In movies and many series, it is usually best to turn it off or keep it very low. Otherwise, the cinematic motion can become too video-like.
Strong motion enhancement can also cause errors. You may see ghosting, jerkiness, or strange edges around fast-moving objects.
HDR needs its own picture mode
An HDR image is not just a brighter version of a standard image. It includes a wider range of brightness and often a wider range of colors. Your TV will usually automatically switch to HDR mode when it detects HDR content.
For HDR, it is recommended to use your TV's native HDR Movie, HDR Cinema, HDR Filmmaker or Dolby Vision mode. It is not a good idea to forcefully copy the settings of a regular SDR picture to HDR, as the TV processes the picture differently.
A dedicated gaming space
When it comes to gaming, the most important thing is low latency. When you press a button on your controller, the action needs to appear on the screen quickly. That's why it's a good idea to set your TV to Game Mode for gaming.
Game mode removes some of the heavy image processing and reduces lag. The image may not look exactly the same as in Movie mode, but it will be more responsive.
Calibration takes adjustments further
Basic adjustments can go a long way, but more precise calibration can improve the picture even further. Calibration involves measuring the TV with measuring devices and adjusting it as close to standards as possible. This allows for more precise adjustments to color tones, grayscale, and brightness in the room in question.
If you are more interested in the topic, AVPlus.fi also has a separate article about television calibration and picture adjustments.
Read also: Television picture calibration – Benefit or scam?
Summary
A better TV picture is usually not achieved by adding every possible enhancement. Often, a better result is achieved by the opposite: choosing a calmer picture mode, reducing excessive sharpening, keeping colors natural, and only using motion enhancement when it is truly beneficial.
A new TV may look great straight out of the box, but that doesn't mean it's the best settings for your home. A little tweaking can usually make the picture more natural, balanced, and enjoyable. The main principle is simple: adjust your TV for your own viewing space and use, not for the store demo image.